During the disassembly process I’ll go though the following major steps:
STEP 1-8: Accessing laptop memory. Removing laptop hard drive and optical drive.
STEP 8-14: Disconnecting and removing laptop palmrest.
STEP 15-20: Removing laptop keyboard.
STEP 20-26: Removing laptop bottom cover.
STEP 27-28: Accessing and removing laptop cooling fan. Accessing laptop DC power jack.
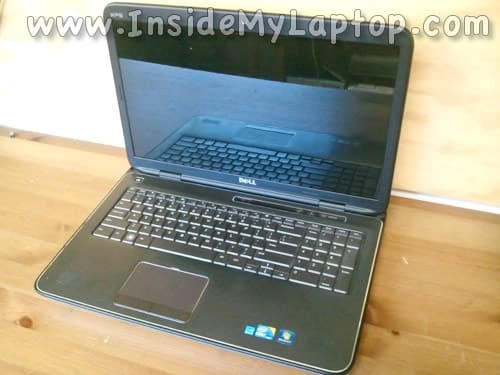
Before you start taking it apart make sure the laptop is turned off.
STEP 1.
Unlock and remove the main battery.
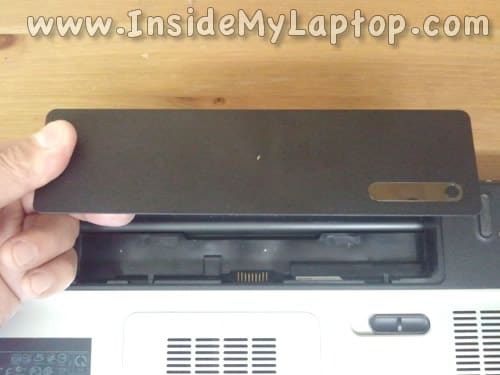
STEP 2.
Remove the service cover on the bottom of the laptop.

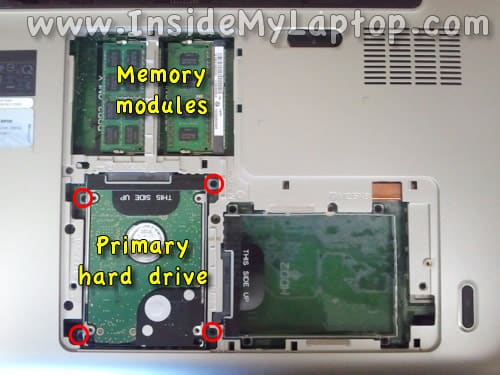
STEP 3.
Under the service cover you can access both memory modules and hard drive.
Remove four screws securing the main hard drive mounting bracket.
STEP 4.
Slide the hard drive to the shown direction in order to disconnect it from the motherboard.
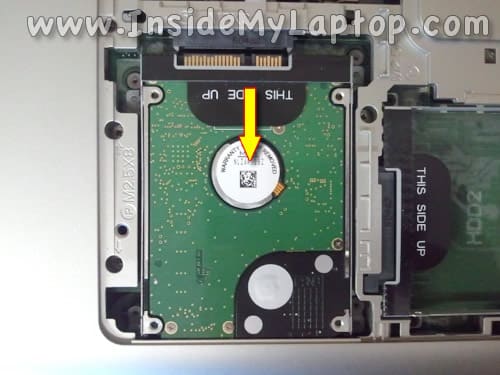
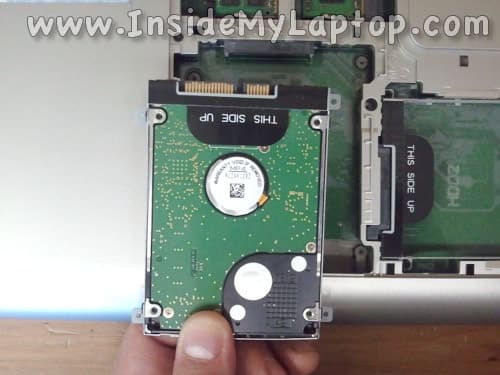
STEP 5.
Remove the primary hard drive from the laptop.
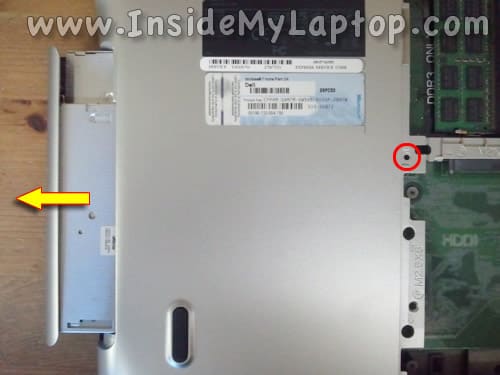
STEP 6.
Remove one screw securing the optical drive.
Pull the optical drive from the laptop and remove it.
UPDATE: you’ll find three screws located under the DVD drive. These screws must be removed before you can remove the palmrest assembly in the step 8.
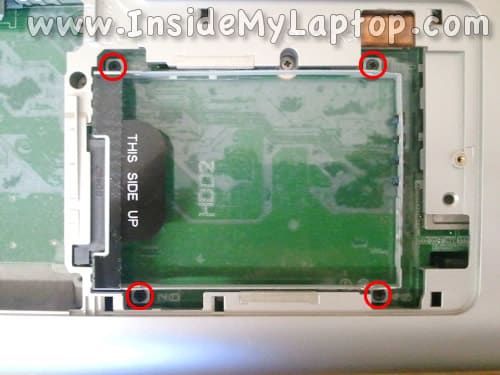
STEP 7.
Remove for screws securing the secondary hard drive mounting bracket.
In my Dell XPS L701X laptop I had only one hard drive installed.
Remove the mounting bracket.
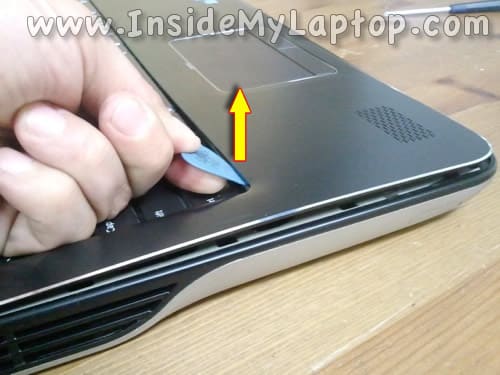
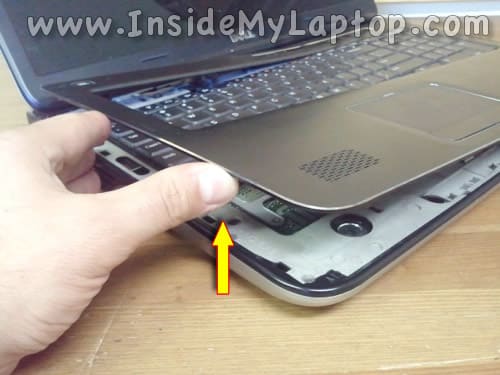
STEP 8.
Start removing the palmrest.
UPDATE: three screws located under the DVD drive (removed in STEP 6) has to be removed in order to remove the palmrest assembly.
Insert a piece of plastic (I’m using the guitar pick) under the palmrest and lift it up.
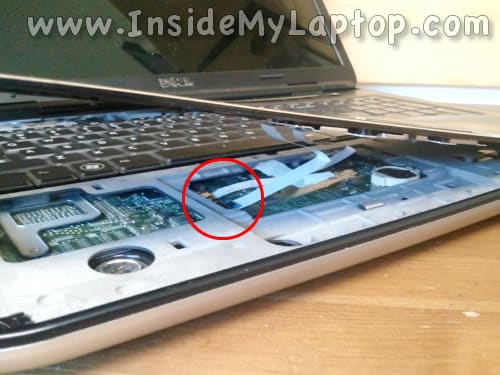
STEP 9.
Continue removing the palmrest with your fingers.
WARNING! The touchpad cables are still connected to the motherboard.
Before you can remove the palmrest completely it’s necessary to disconnect the touchpad cables.
STEP 10.
The palmrest has been separated from the laptop base.

STEP 11.
Place the palmrest so you can access the touchpad cables.
In the following two steps I explain how to unlock connectors and release cables.
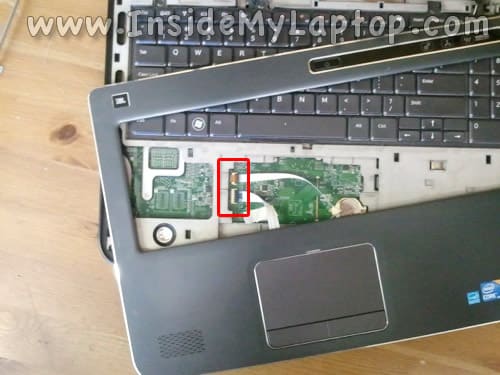
STEP 12.
In order to unlock the connector you’ll have to lift up the right side of the cable retainer.
The retainer will open up at a 90 degree angle.
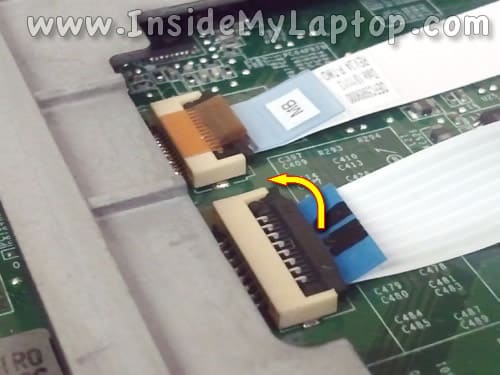
STEP 13.
On the following picture the connector shown in the UNLOCKED position. Now you can pull the cable from the connector.
Disconnect the second touchpad cable.

STEP 14.
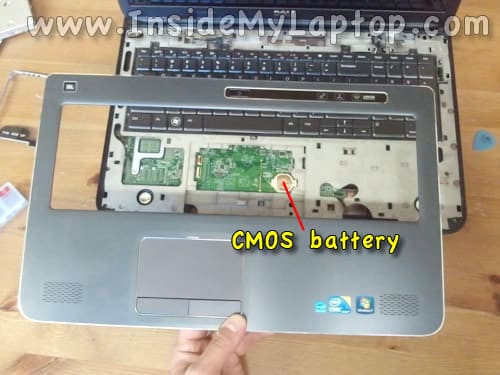
Now you can remove the palmrest from the laptop completely.
After the palmrest removed you can access the CMOS battery.
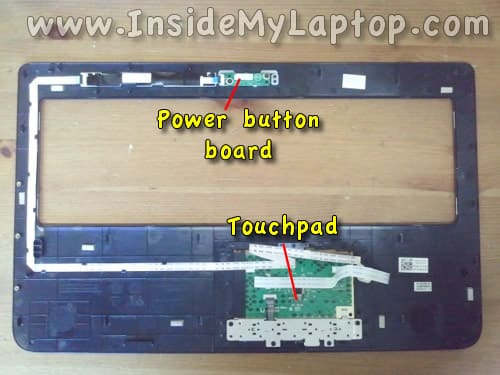
Here’s the bottom side of the palmrest.
Here you can access the touchpad and power button board.
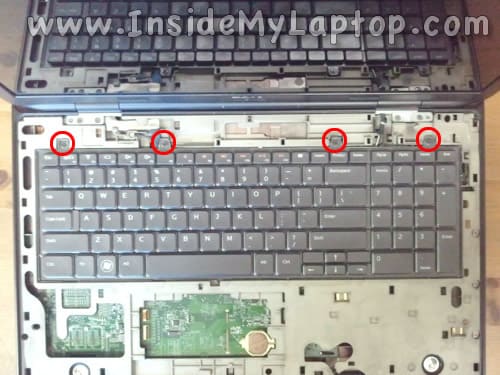
STEP 15.
Remove four screws securing the keyboard.
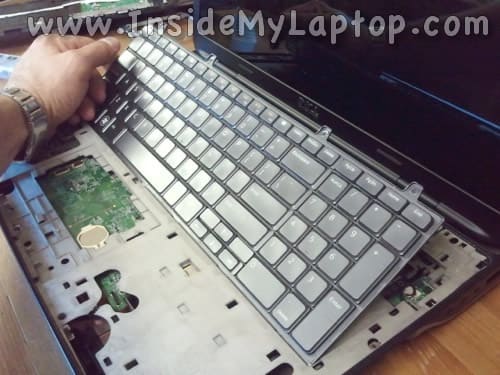
STEP 16.
Lift up the keyboard and turn it upside down.
STEP 17.
Now you can access the keyboard cable connector.
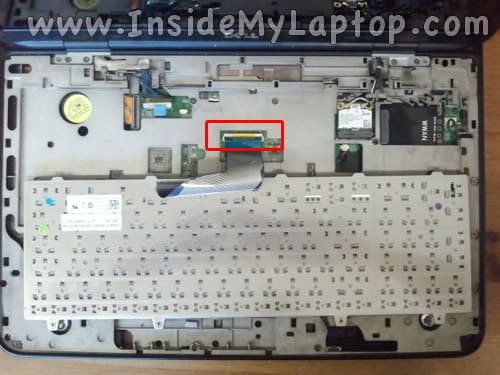
STEP 18.
Unlock the connector by lifting up the left side of the cable retainer.
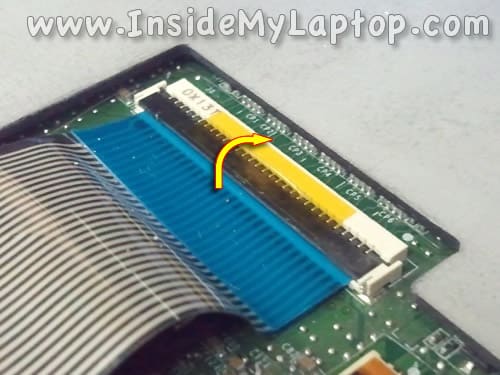
STEP 19.
Disconnect the keyboard cable from the connector.

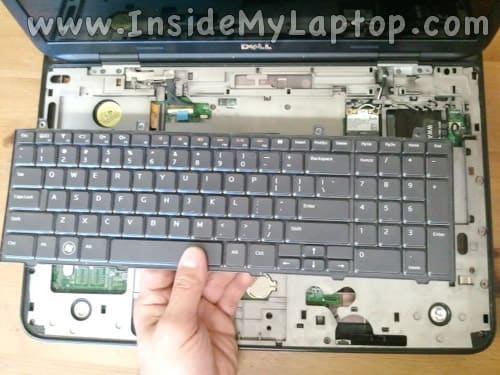
STEP 20.
Remove the laptop keyboard.
If you need a new replacement keyboard for your Dell XPS 17 L701X laptop, you can find it here.
STEP 21.
Remove screws securing the top cover assembly.
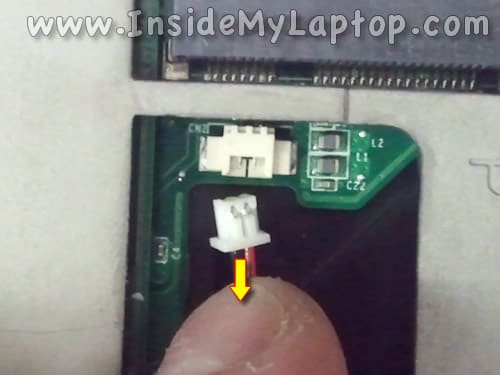
Unplug the speaker cable from the motherboard.
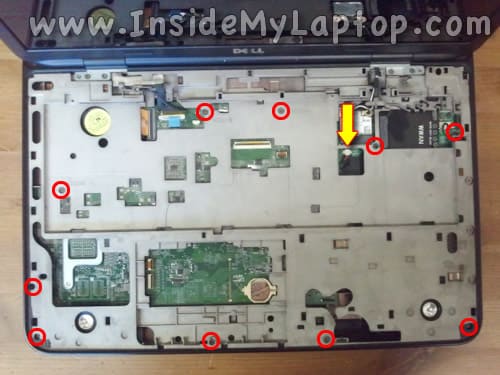
Here’s how to unplug the cable.
STEP 22.
Remove screws from the bottom of the laptop.
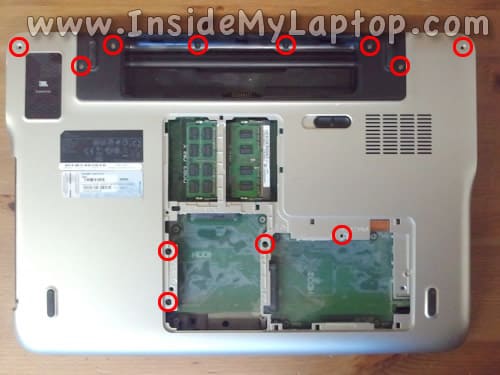
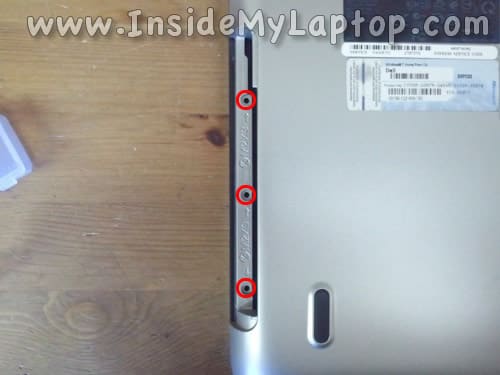
STEP 23.
Don’t forget three screws located in the optical drive bay.
STEP 24.
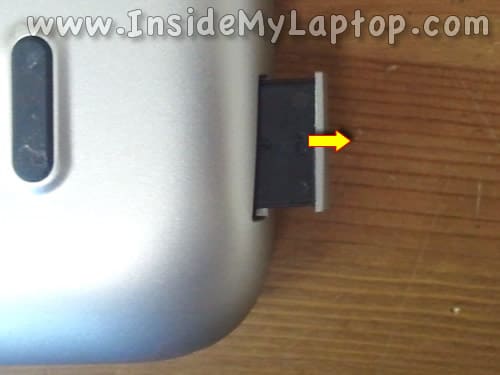
Remove the SD slot cover.
STEP 25.
Start separating the bottom cover from the laptop.
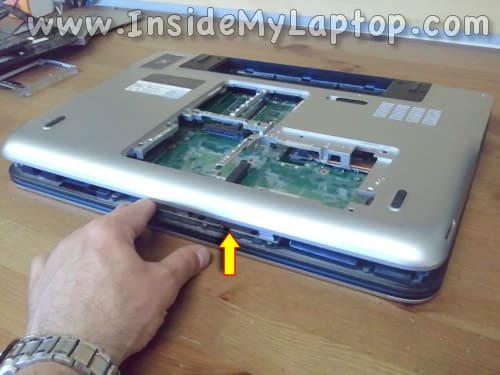
STEP 26.
Remove the bottom cover.
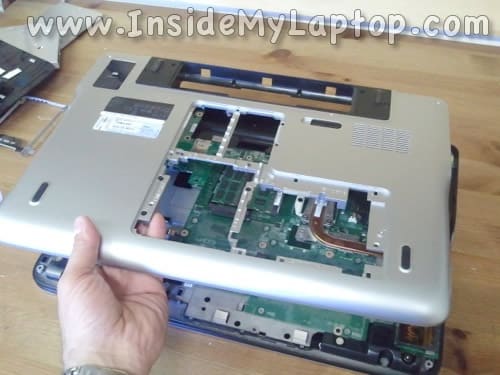
The bottom cover has been removed.
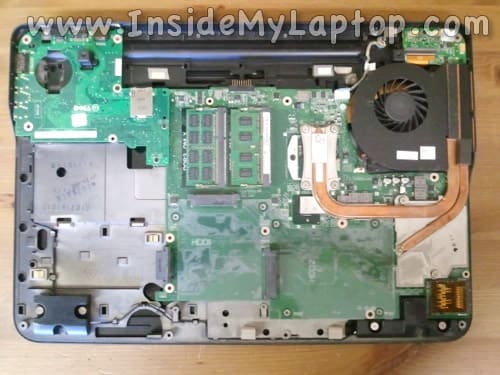
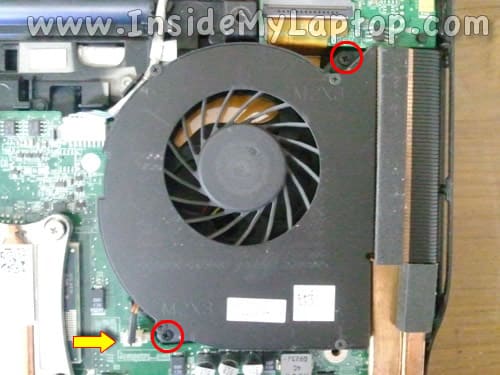
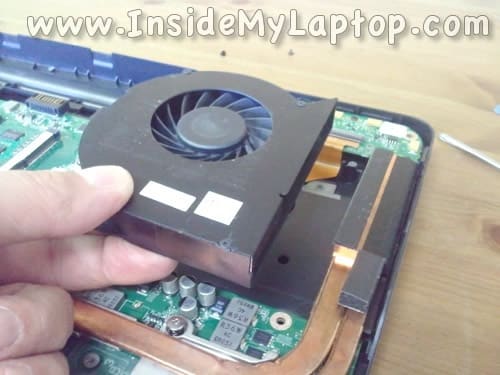
STEP 27.
Remove two screws securing the cooling fan.
Disconnect fan cable from the motherboard.
STEP 28.
Remove the fan.
New replacement cooling fans for Dell XPS 17 L701X laptops available here.
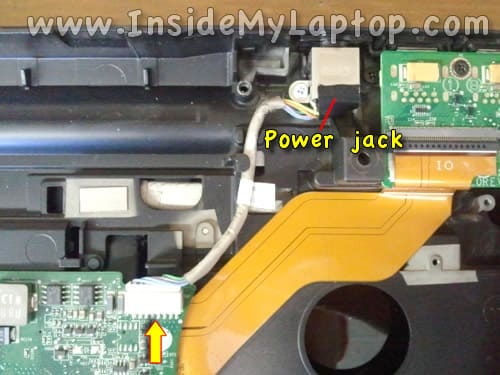
The DC power jack connected to a cable. It can be easily removed and replaced.
New DC jacks for Dell XPS 17 L701X laptops available here.
This is dummy text. It is not meant to be read. Accordingly, it is difficult to figure out when to end it. But then, this is dummy text. It is not meant to be read. Period.
ConversionConversion EmoticonEmoticon